It's been a while since I posted so I'm trying to get caught up on the back log from last season.
These little gems were something I made for the playoff game tailgate in January. They were gone in 10 mins so I didn't get a good picture of them. Also the picture was taken with my cell phone so its not the best quality.
Ingredients:
1 lb of boneless skinless chicken breast
1 cup of chicken broth
3-4 tbsp of Frank's red hot wing sauce
Tastefully Simple Cheesy Chive Mix
Blue cheese dressing
2 packs of crescent rolls
1 pack of shredded cheddar cheese
Directions:
In a slow cooker cook chicken and broth for 5-6 hours on low or until you can shred the chicken easily with a fork. Take the chicken out and drain the broth.
For the tailgate I did this overnight and shredded it in the morning before heading out. Once the chicken is drained I added the wing sauce and cheesy chive mix. I did a little at a time until it was spicy but not too spicy. If you love hot sauce then add more. Just make sure its not dripping just coated.
Separate the crescent rolls and scoop a little in the middle. Add some shredded cheddar cheese on top of each bit of meat. Fold the crecsent over.
Heat the oven to 350 degrees. Cook in the oven for 10-15 mins or until the roll is golden brown the and insides are bubbly.
I used the Camp Chef Oven during the tailgate so I cooked them a little longer since it was propane and not gas/electric powered. Serve with a little blue cheese dressing on the side for dipping! Enjoy!
Showing posts with label tailgating. Show all posts
Showing posts with label tailgating. Show all posts
Friday, October 18, 2013
Wednesday, January 30, 2013
Superbowl Bound this Weekend!
Well its been awhile since I've posted. Its been a busy holiday season with a ton of tailgates but also some sicknesses in the family.
The best thing though is that our Baltimore Ravens are superbowl bound this weekend!
Our tailgate group will be down there in the Big Easy (New Orleans) for the big game. Our tailgate will be scaled to subs and beer but we will be there and cheering on our boys!
Check back for updates as I catch up on the last couple months of tailgates and recipes. I need to dig through the backlog!
Thursday, November 29, 2012
Old Bay Wings
So here's a great Maryland twist on an old staple. Old Bay wings are big around here but at $10 or so a pop they get expensive. ShopRite had a great sale on fresh chicken wings so I thought why not try it myself. OMG!!!! They were so fresh and awesome right from the fryer.
Ingredients:
Directions:
Preheat deep fryer to 350-375 degrees.

Cut chicken wings. Cut off the tip and discard. Cut the drum stick and thigh apart.


Place the chicken on a paper towel so any excess juices drain out. This is important so you don't have as much splatter.

Place chicken a few pieces at a time (or more if you have a bigger deep fryer) for approximately 12 minutes. Flipping occassionally so they cook evenly.

Take out and immediately sprinkle a generous amount of old bay on each side.

Enjoy! Super easy and so yummy!
Ingredients:
- Fresh chicken wings
- Old Bay
- Deep Fryer with your choice of oil
Directions:
Preheat deep fryer to 350-375 degrees.

Cut chicken wings. Cut off the tip and discard. Cut the drum stick and thigh apart.


Place the chicken on a paper towel so any excess juices drain out. This is important so you don't have as much splatter.

Place chicken a few pieces at a time (or more if you have a bigger deep fryer) for approximately 12 minutes. Flipping occassionally so they cook evenly.

Take out and immediately sprinkle a generous amount of old bay on each side.

Enjoy! Super easy and so yummy!
Monday, October 29, 2012
Chicken Piccata
Shoprite had a super sale on boneless chicken a few weeks ago. It was something ridiculous like $1.69/lb. It was like the chicken was taunting me and saying...please come buy me and make me into something delicious.
Found this recipe on foodnetwork.com. I've had chicken piccata at restaurants a few times and enjoyed it minus the capers. Is that what the hell they're called? They might as well have just called them crappy little green balls that are masquerading as a pea wanna-be.
Can you tell I'm tired and have been up all night? :-)
Anyways the original recipe is here.
Ingredients:
2 skinless and boneless chicken breasts, butterflied and then cut in half (I just cut in half and beat them with a meat tenderizer to make them thin. To each his own)
Sea salt and freshly ground black pepper
All-purpose flour
6 tablespoons unsalted butter (I used 4 tbsp...6 seemed a little much to me)
5 tablespoons extra-virgin olive oil
1/3 cup fresh lemon juice
1/2 cup chicken stock
1/4 cup brined capers, rinsed (you know my stance on capers...I didn't use them)
1/3 cup fresh parsley, chopped
Little bit of minced garlic (not in the original recipe but I love garlic)


Found this recipe on foodnetwork.com. I've had chicken piccata at restaurants a few times and enjoyed it minus the capers. Is that what the hell they're called? They might as well have just called them crappy little green balls that are masquerading as a pea wanna-be.
Can you tell I'm tired and have been up all night? :-)
Anyways the original recipe is here.
Ingredients:
Directions:
Combine flour, salt and pepper in a tray or bowl. Mix well.
Coat the chicken in it on both sides.
Heat a skillet and put in the olive oil and butter. Melt the butter.
Add the chicken and fry on both sides until slightly brown.

Preheat oven to 350 degrees. Grease a 9x13 pan. Place chicken in the pan.
Take the leftover juices in the skillet and add chicken stock, parsley, garlic and lemon juice. Mix and cook for about 5 mins on medium/low until slightly reduced.
Pour the skillet mix onto the chicken.

Bake for approximately 20-30 mins until chicken is down all the way through.
Friday, October 12, 2012
Spinach and Bacon Stuffed Mushrooms
This is another recipe I found on the Skinnytaste blog. It was good but I think I needed bigger mushrooms because all my filling kept falling out.
The original recipe is found here.
Ingredients:
Directions:
Preheat oven to 400 degrees.

Take the stems from the mushrooms and mince them.

Take the minced stems, garlic and olive oil and saute in skillet for a few minutes. Add in spinach until it starts to wilt.

In a bowl, combine skillet contents with the remaining ingredients (minus the actual mushroom caps)
In a muffin tin place the mushroom caps and stuff with the contents of the bowl. I found this works great because then the mushrom doesn't slide all over the place with you remove the tray from the oven.

Cook for 20 mins in oven until slightly browned.
The original recipe is found here.
Ingredients:
- 14 oz (1 package) fresh mushrooms (remove stems)
- 2 garlic cloves, sliced thin (I used minced garlic)
- 4 cups fresh baby spinach
- 4 slices center cut bacon (I cheated and used Hormel real bacon bits)
- 1 tsp olive oil
- 1/4 cup Italian seasoned bread crumbs
- 2 tbsp shredded Parmesan cheese
Directions:
Preheat oven to 400 degrees.

Take the stems from the mushrooms and mince them.

Take the minced stems, garlic and olive oil and saute in skillet for a few minutes. Add in spinach until it starts to wilt.

In a bowl, combine skillet contents with the remaining ingredients (minus the actual mushroom caps)
In a muffin tin place the mushroom caps and stuff with the contents of the bowl. I found this works great because then the mushrom doesn't slide all over the place with you remove the tray from the oven.

Cook for 20 mins in oven until slightly browned.
Grilled Honey Lime Chicken Skewers
Saw this recipe originally on the blog Cooking Classy. I adapted it for the skewers since I love using them for tailgates since it means no plates or utensils needed.
Loved the taste of these. They went down very smooth and the chicken was really tender.
The original recipe can be found here.
Ingredients:


Loved the taste of these. They went down very smooth and the chicken was really tender.
The original recipe can be found here.
Ingredients:
- 1.5 lbs boneless skinless chicken breast halves
- 1/4 cup fresh lime juice (I used the lime juice in the little green container so I guess I cheated a little)
- 1/4 cup honey
- 2 Tbsp extra virgin olive oil (Iused plain olive oil since I was out of EVOO)
- 1 Tbsp soy sauce
- 1 Tbsp packed light-brown sugar
- 1/2 tsp salt
- 1/2 tsp freshly ground black pepper
- 1/4 tsp onion powder
- 1/4 tsp garlic powder or 1 clove finely minced garlic
- 1/8 - 1/4 tsp cayenne pepper (I used a little less than 1/8 tsp but I don't like spice)
Directions:
Cut the chicken into strips. Soak wooden skewers if using them. If metal ones are used no need to soak in water so carry on! :-)

Throw ingredients and chicken into ziploc bag and marinade for 30 minutes.

Take chicken out and thread onto skewers.

Cook on grill on low heat for approximately 10 mins or until cooked through.
Asian Flank Steak Skewers
I love love this recipe. I found it on the blog for Skinnytaste. Everyone loved this!
This will be great for tailgate because anything on a stick is easy and doesn't use plates or utensils.
The original recipe is located here.
Ingredients:
Directions:
If you are using metal skewers ignore this step. If you are using wooden skewers then make sure you soak in water for 30 mins. If not you're going to have a hot mess on your hands and the skewers will catch fire part way through the cooking. And they you'll char your hands trying to get them off the grill. Can you tell I've forgotten this step and done that several times before??? :-)

Cut the steak in the strips. Mix all the other ingredients together and put the steak and the ingredients in the ziploc bag. Squish it all around until its coated.

Let marinade for 30 mins or more.
Take out of bag and thread onto the skewers.

Cook on grill in direct heat on a low setting for about 10 mins give or take until they are cooked to your liking.
This will be great for tailgate because anything on a stick is easy and doesn't use plates or utensils.
The original recipe is located here.
Ingredients:
- 1 1/2 lbs flank steak (sliced it to about 1/4 inch)
- 1 1/2 cups reduced sodium soy sauce (make sure it reduced sodium or you will have a salty mess on your hands...believe me I did that the first time and it was gross)
- 2 cloves minced garlic
- 1 tsp fresh ginger (I used the powdered from the pantry)
- 1 tsp sesame oil
- 1 lime juice
Directions:
If you are using metal skewers ignore this step. If you are using wooden skewers then make sure you soak in water for 30 mins. If not you're going to have a hot mess on your hands and the skewers will catch fire part way through the cooking. And they you'll char your hands trying to get them off the grill. Can you tell I've forgotten this step and done that several times before??? :-)

Cut the steak in the strips. Mix all the other ingredients together and put the steak and the ingredients in the ziploc bag. Squish it all around until its coated.

Let marinade for 30 mins or more.
Take out of bag and thread onto the skewers.

Cook on grill in direct heat on a low setting for about 10 mins give or take until they are cooked to your liking.
Wednesday, August 29, 2012
7UP Grilled Chicken
I saw this recipe on food.com and thought it was interesting. 7UP in a chicken marinade...hmmmm...I was curious. The original recipe is here.
I modified it since soy sauce always seems to make it too salty for my taste.
The results were a grilled chicken that was moist and yummy. It didn't dry out on the grill like a lot of chicken breasts do when cooked.
Ingredients:
Directions:
Preheat grill.
Throw all the ingredients and chicken into a bag and marinate for 30-60 minutes (or longer).


I modified it since soy sauce always seems to make it too salty for my taste.
The results were a grilled chicken that was moist and yummy. It didn't dry out on the grill like a lot of chicken breasts do when cooked.
- 4 pieces of boneless skinless chicken
- 1 can of 7UP or other lemon-lime beverage
- 1 tsp garlic powder
- 1/4 cup of soy sauce (original called for 1/2 cup but I didn't want all the saltiness)
- 1/2 cup of canola oil
Directions:
Preheat grill.
Throw all the ingredients and chicken into a bag and marinate for 30-60 minutes (or longer).

Throw the chicken on the grill and grill until cooked without any pink inside.

Tuesday, August 28, 2012
Slow Cooker Beef Au Jus (French Dip) Sandwiches
This recipe is the easiest thing ever and it was delicious!
This was also a camping thing. Ok so maybe we weren't "roughing it". As a good friend of mine calls it..."glamping".
I brought the slow cooker along and put this on while we were swimming and fishing.
For tailgate I would make it ahead and transport and throw in the chafing dish to keep warm.
Ingredients:
Directions:
Set crock pot to low.

Put in all the ingredients except roast beef and stir.

Put in roast beef.
Cook on low for about 4 hours.

Serve on mini sub roll with provolone cheese on top. Scoop out some of the beef broth into a little bowl and serve on the side of the sandwich. Dip the sandwich in the broth each bite!
This was also a camping thing. Ok so maybe we weren't "roughing it". As a good friend of mine calls it..."glamping".
I brought the slow cooker along and put this on while we were swimming and fishing.
For tailgate I would make it ahead and transport and throw in the chafing dish to keep warm.
Ingredients:
- 1 lb of deli roast beef (best if its still got some red to it since it will cook for awhile)
- 2 cans of beef consomme
- 2 cups of water
- 1 packet of Lipton Onion soup mix
- Provolone Cheese
Directions:
Set crock pot to low.

Put in all the ingredients except roast beef and stir.

Put in roast beef.
Cook on low for about 4 hours.

Serve on mini sub roll with provolone cheese on top. Scoop out some of the beef broth into a little bowl and serve on the side of the sandwich. Dip the sandwich in the broth each bite!
Grilled Italian Chicken Skewers
While we were camping I was loving grilling things on sticks. I used a tried and true recipe. Its so simple and tastes great.
I've done these many times for tailgate. I just marinate everything ahead of time and throw it on the grill when we get there. Super easy!
Ingredients:

Directions:
2-3 hours before grilling time. Take the chicken strips and marinate them in the Italian dressing.

Preheat the grill
Thread chicken on to wooden skewers. It will help if you soak the skewers in water for a bit before grilling so they don't burn.
Cook on grill until done.

**NOTE: The picture shows the Peanut Dipping Sauce for another recipe. The Italian skewers are the ones at the top of the picture on the right. **
I've done these many times for tailgate. I just marinate everything ahead of time and throw it on the grill when we get there. Super easy!
Ingredients:
- Bottle of Italian dressing
- 4-5 boneless skinless chicken breasts (cut into strips)
- Wooden Skewers

Directions:
2-3 hours before grilling time. Take the chicken strips and marinate them in the Italian dressing.

Preheat the grill
Thread chicken on to wooden skewers. It will help if you soak the skewers in water for a bit before grilling so they don't burn.
Cook on grill until done.

Monday, August 27, 2012
Finally Got to Use the Camping Oven!
What can I say but this thing is absolutely awesome! It's an oven and a stove for tailgating or camping. And it works!

I just got back from camping and used this all weekend on a single canister of propane. I made peach cobbler...overnight french toast casserole...chicken nuggets.

This was well worth every penny!!

I **heart** you camping oven :-)
Some words of advice...
So after a couple trial runs I have it down. If you follow those rules then you will be happy with the end result!

I just got back from camping and used this all weekend on a single canister of propane. I made peach cobbler...overnight french toast casserole...chicken nuggets.

This was well worth every penny!!

I **heart** you camping oven :-)
Some words of advice...
- Preheat the oven and play with the temps...even on the low setting it got hot in there quick.
- When choosing your bakeware...make sure it doesn't hit from end to end inside. This will block how the oven distributes heat and the dish will burn on the bottom since the heat has nowhere to go.
So after a couple trial runs I have it down. If you follow those rules then you will be happy with the end result!
Friday, August 10, 2012
Grilled Pesto Shrimp
So I was in super grill mode on Sunday and decided to make a week's worth of leftovers for lunch in one day. One of the things I'd been wanting to try is Pesto Shrimp. I found a recipe from the Skinny Taste blog and decided to give it a whirl. The link to the orginal recipe is here.
Trying to find basil in the store was a challenge. No basil at all in the little packages. But I found a basil plant for $1.99 that I bought. Worked out great. I picked what I needed and its still in the window and growing more!

These turned out great. The orignial recipe called for skewers but I just did it in a grill basket and that worked out fine.
Ingredients:

Directions:
In a food processor pulse basil, garlic, parmesan cheese, salt and pepper until smooth. Slowly add the olive oil while pulsing. I used the mini food processor from Cuisinart. This little thing is nothing short of amazing. Its tiny, easy to clean and gets the job done for small projects. It was also only $20 on Ebay.
Combine raw shrimp with pesto and marinate a few hours in a bowl.


Heat grill to 350 degrees. Place shrimp in grill basket and grill until they are pink and cooked. Do not burn.


Trying to find basil in the store was a challenge. No basil at all in the little packages. But I found a basil plant for $1.99 that I bought. Worked out great. I picked what I needed and its still in the window and growing more!

These turned out great. The orignial recipe called for skewers but I just did it in a grill basket and that worked out fine.
Ingredients:
- 1 cup fresh basil leaves, chopped
- 1 clove garlic (I used the minced garlic in the jar)
- 1/4 cup grated Parmigiano Reggiano
- 3 tbsp olive oil
- 1 1/2 lbs jumbo shrimp, peeled and deveined
- salt and fresh pepper to taste

Directions:
In a food processor pulse basil, garlic, parmesan cheese, salt and pepper until smooth. Slowly add the olive oil while pulsing. I used the mini food processor from Cuisinart. This little thing is nothing short of amazing. Its tiny, easy to clean and gets the job done for small projects. It was also only $20 on Ebay.
Combine raw shrimp with pesto and marinate a few hours in a bowl.


Heat grill to 350 degrees. Place shrimp in grill basket and grill until they are pink and cooked. Do not burn.


Friday, July 27, 2012
French Onion Burgers
This is something I've been making for a long time and its so yummy to turn an ordinary burger into something special. Remember if you don't like onions...probably not a good idea to try this one :-)
Ingredients:
Directions:
Preheat grill.

Mix together meat and soup mix.
Shape into hamburgers.

Grill until done to your liking. I put cheese on it. You know whats funny is that my husband hates these burgers since he doesn't like onion so I have to make the cheese into a different pattern on the top so he knows these are the "poison" burgers. That's why the cheese is criss crossed on the pictures.
Ingredients:
- 1lb of 95% lean ground beef (I only use lean since I'm grossed out by meat fat)
- 1 packet of french onion soup mix
- American Cheese
Directions:
Preheat grill.

Mix together meat and soup mix.
Shape into hamburgers.

Grill until done to your liking. I put cheese on it. You know whats funny is that my husband hates these burgers since he doesn't like onion so I have to make the cheese into a different pattern on the top so he knows these are the "poison" burgers. That's why the cheese is criss crossed on the pictures.
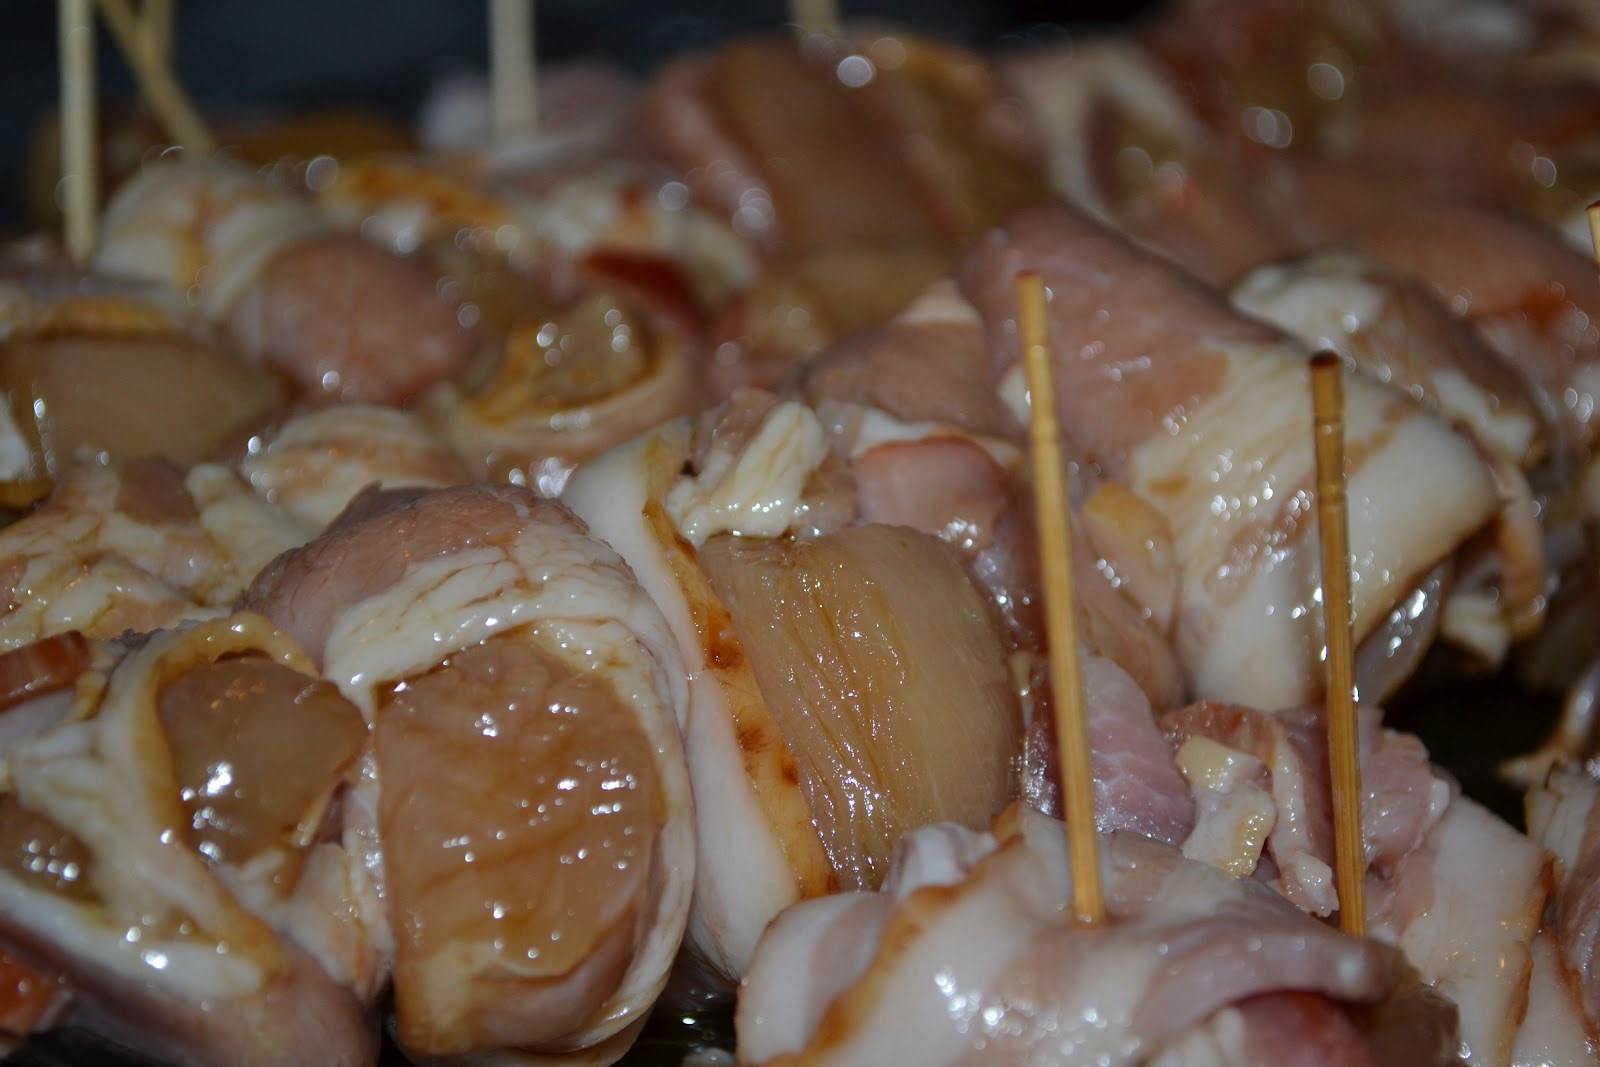
Bacon Wrapped Chicken Kabobs
Found this recipe here at Six Sisters Stuff blog.
First let me just say that I'm not a big kabob fan. Why you might ask...because its a pain in the ass to keep the meat on the stick and to turn it on the grill without frying the hairs off my hand.
But this recipe looked so good I couldn't turn down an attempt at it.
Ingredients:
Directions:

In a large bowl...mix together the soy cause, vinegar, honey and oil. Put the chunks of chicken in and stir to coat them.
Cover the bowl and place in the fridge for an hour or more.

Preheat the grill.

Wrap each chunk of chicken in bacon and slid on the skewer. Brush with the leftover mixture from the bowl.

Put the kabobs on the grill and cook about 15-20 minutes until they are cooked and the juice is clear. Make sure you turn them over occasionally.
Oh and it goes without saying but make sure you take them off the skewers before eating. :-)

First let me just say that I'm not a big kabob fan. Why you might ask...because its a pain in the ass to keep the meat on the stick and to turn it on the grill without frying the hairs off my hand.
But this recipe looked so good I couldn't turn down an attempt at it.
Ingredients:
- 1/4 cup soy sauce
- 1/4 cup cider vinegar
- 2 Tbsp honey
- 2 Tbsp oil
- 3 boneless, skinless chicken breasts, cut into chunks
- 1 package of bacon (cut into 3rds)

In a large bowl...mix together the soy cause, vinegar, honey and oil. Put the chunks of chicken in and stir to coat them.
Cover the bowl and place in the fridge for an hour or more.

Preheat the grill.
Wrap each chunk of chicken in bacon and slid on the skewer. Brush with the leftover mixture from the bowl.

Put the kabobs on the grill and cook about 15-20 minutes until they are cooked and the juice is clear. Make sure you turn them over occasionally.
Oh and it goes without saying but make sure you take them off the skewers before eating. :-)

Sunday, July 15, 2012
Presto Salad Shooter..Where have you been all my life??!!
My other big find...my $10 used Presto Salad Shooter from the 80s? 90s? Anyways this thing rocks. I've been grating all my zaucchini and cheese my hand lately and its killing me. Takes soooo much time and effort.
This little beauty though eats through a zucchini in like 2 seconds! Score!
Cheese .... no problem! I've used it like 10 times already this week and it has a slicing attachment I haven't even tried yet.


This little beauty though eats through a zucchini in like 2 seconds! Score!
Cheese .... no problem! I've used it like 10 times already this week and it has a slicing attachment I haven't even tried yet.


Thursday, July 5, 2012
Bobby Flay's Silicone Basting Barbeque Brush
Just wanted to talk about one of my favorite new products this season. My old cooking brushes were pretty beat up this year. Early in the BBQ season I had some Kohl's cash and a 30% off coupon (if you get a 30% off coupon its like its begging you to use it!). So I packed up both kids and went for an adventure to Kohl's.
I looked along the wall and found some brushes that were similar to my old ones. But you see the thing is I hated those old ones...maybe I secretly plotted their demise so I could get something new :-) The problem with the old ones I had was that for vinegar and things that had a runny texture it was hard to "slop" enough on the meat to coat it.
So then I looked around some more and found my answer...The Bobby Flay Silicone Basting Brush!!!! I love you little red brush!

It was $8.49 plus 30% off. What's not to love about that!
I've used it soooo many times now. For barbeque sauce...for vinegar onto pit beef...for ketchup on meatloafs...the uses of this thing go on and on. But the best thing is that it picks up a lot of stuff so you can just slather on your marinade or sauce! LOVE IT!
Saturday, June 9, 2012
Copycat PF Chang's Chicken Lettuce Wraps
Love PF Chang's food but the closest one is 20-25 minutes away. There are also some folks in the tailgate that are on the Atkin's Diet so I was looking for a recipe that didn't have a lot of carbs.
Found this recipe on the web when I did a google search for "Lettuce Wraps from PF Changs". Thought I would give this a shot. I modified the original recipe that I found.
I've got to say its similar to PF Chang's but not exactly the same. But it was really really good.
Ingredients:

Marinade
Filling Ingredients


Cooking Sauce
Lettuce leaves (washed)
Directions:
Mix all the ingredients for "cooking sauce" and set aside.
In bowl, combine marinade ingredients and mix well. Add chicken and stir to coat. Stir in 1 tsp of oil and set sit for 15 mins.

Heat wok or frying pan over medium-high heat. Add 3 tsp of oil. Add chicken and stir fry for 3-4 mins. Set aside.
Add 2 tsp of oil to the pan. Add ginger, garlic and minced onions. for a minute or so. Add mushrooms, bean sprouts, and water chesnuts. Stir and cook for 2 mins.

Return chicken to the pan. Add cooking sauce to the pan. Cook until thickened and hot.

To serve, pour the mixture into a lettuce leaf and eat like a burrito. (NOTE: make sure that the mixture is drained a little before putting in the lettuce leaf or it will get soggy)


Found this recipe on the web when I did a google search for "Lettuce Wraps from PF Changs". Thought I would give this a shot. I modified the original recipe that I found.
I've got to say its similar to PF Chang's but not exactly the same. But it was really really good.
Ingredients:

Marinade
- 1 tsp cornstarch
- 2 tsps red wine
- 2 tsps water
- 2 tsps soy sauce
Filling Ingredients
- 1.5 lbs of boneless skinless chicken breasts, diced small
- 5 tbsp of vegetable oil
- 1 tsp of ground ginger
- 2 tsp garlic, minced
- 1 cup of shittake mushrooms
- Few shakes of minced onions
- 1/2 can of bean sprouts (drained)
- 1 can (8oz) of water chesnuts (drained)


Cooking Sauce
- 1 tbsp hoison sauce
- 1 tbsp soy sauce
- 1 tbsp red wine
- 2 tbsps oyster sauce
- 2 tbsp water
- 1 tsp sesame oil
- 1 tsp sugar
- 2 tsps cornstarch
Lettuce leaves (washed)
Directions:
Mix all the ingredients for "cooking sauce" and set aside.
In bowl, combine marinade ingredients and mix well. Add chicken and stir to coat. Stir in 1 tsp of oil and set sit for 15 mins.

Heat wok or frying pan over medium-high heat. Add 3 tsp of oil. Add chicken and stir fry for 3-4 mins. Set aside.
Add 2 tsp of oil to the pan. Add ginger, garlic and minced onions. for a minute or so. Add mushrooms, bean sprouts, and water chesnuts. Stir and cook for 2 mins.

Return chicken to the pan. Add cooking sauce to the pan. Cook until thickened and hot.

To serve, pour the mixture into a lettuce leaf and eat like a burrito. (NOTE: make sure that the mixture is drained a little before putting in the lettuce leaf or it will get soggy)


Subscribe to:
Comments (Atom)