Friday, August 31, 2012

Chicken Cordon Bleu Casserole

This past weekend we had stopped at BJs and the boneless skinless chicken was $1.89 a pound.  Now to find something to make with it since the package was pretty big.

Found a recipe for Slow Cooker Chicken Cordon Bleu but I didn't have the time for that so I adapted it for a 9x13 pan and only an hour of time.

The original recipe was on allrecipes.com.  The link is here.

Ingredients:

  • 4-5 boneless skinless chicken breasts
  • Deli ham slices
  • Swiss cheese slices
  • 1 can of cream of chicken
  • 1 cup of milk
  • 1 package of Stove Top chicken stuffing
  • 1 cup of shredded mozzarella cheese
  • 1/4 cup of butter (melted)

Directions:

Take the chicken and cut off the fat and chop into cubes. 

Preheat oven to 350 degrees.  Grease a 9x13 pan.

Place the chicken on the bottom of the pan.


Mix the milk and soup in a bowl and pour evenly over the chicken.  Layer the ham.  Then the swiss cheese.


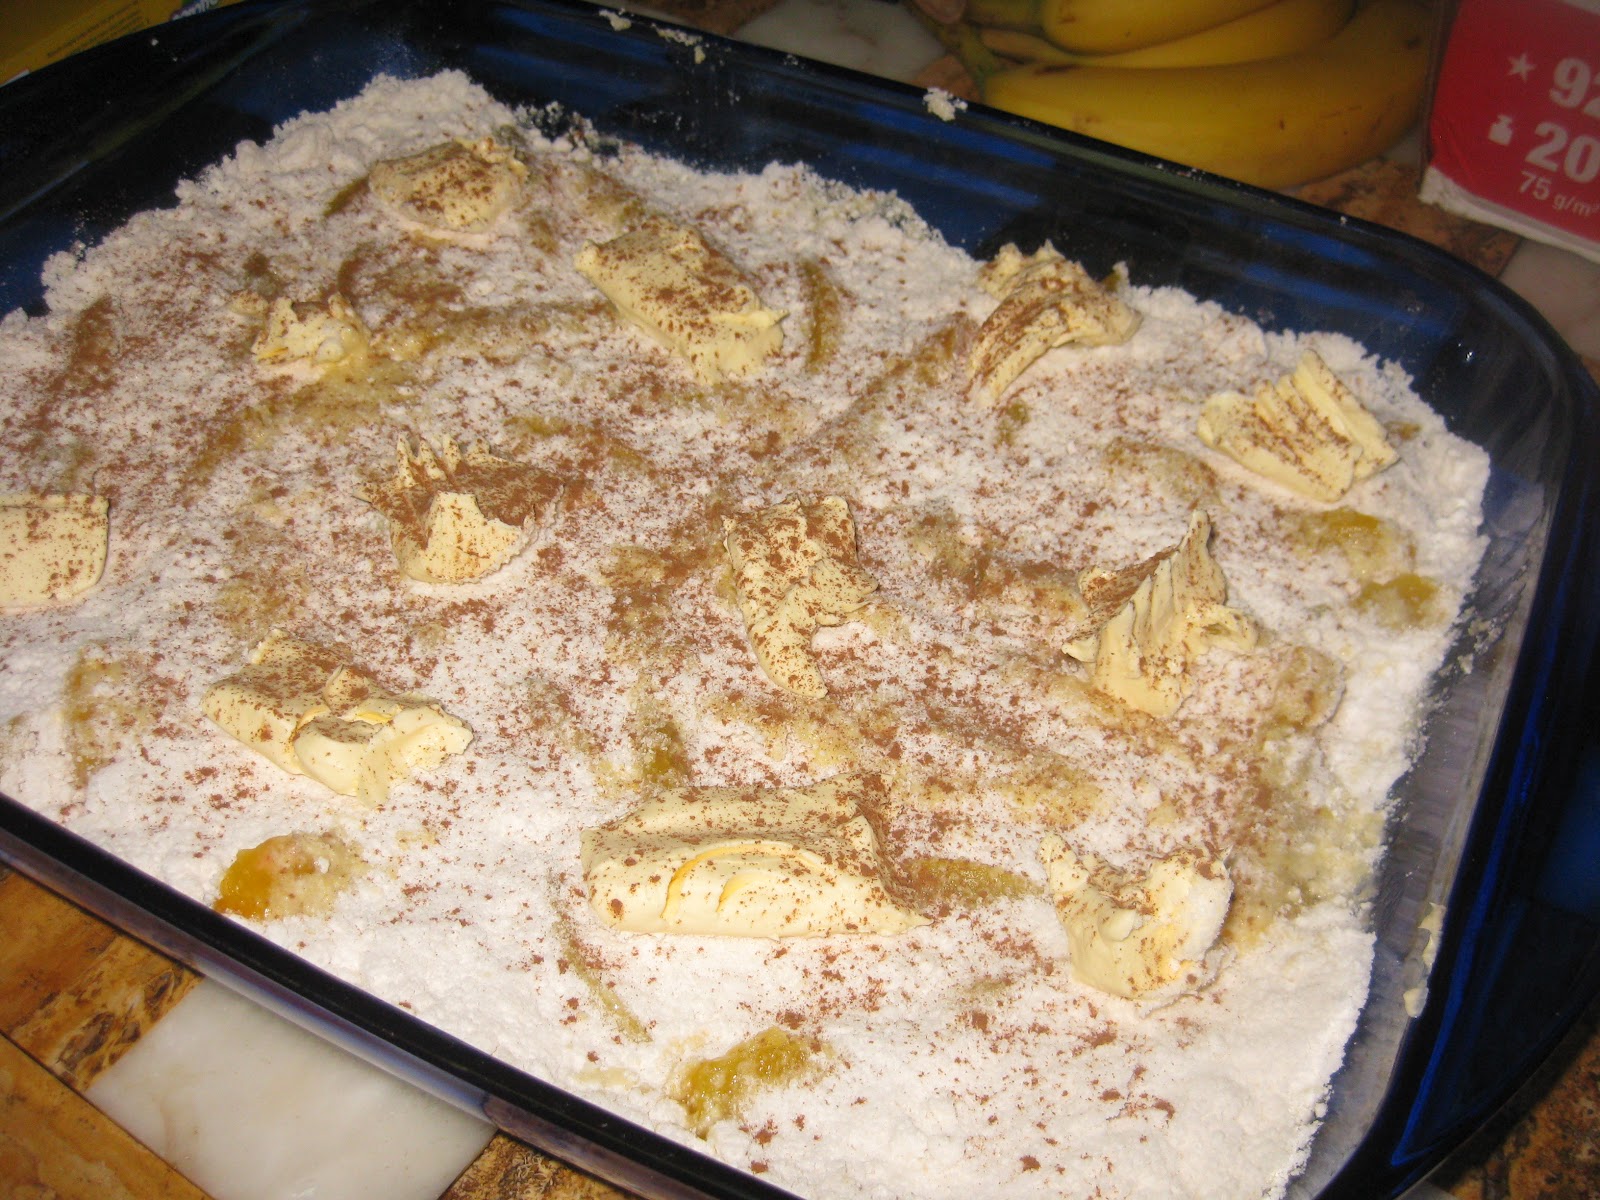
Sprinkle the stuffing on top and drizzle the melted butter.  I added a few chunks of butter for good measure.

Cover and bake for 50 mins.  At this point it looked about done but the stuffing on top was hard in spots because there wasn't enough moisture. 


So I sprinkled the mozzarella cheese on top and baked another 5-10 minuutes. 

 
Still seemed hard so I drizzled a tiny bit of water on it.  That seemed to do the trick.  I cut into chunks and served.


Mini Fruit Pizzas / Cups

My daughter was really really into this one.  She saw the picture and kept begging me to make these.  I finally got all the ingredients and we gave it a shot.

The idea and recipe came from the blog Banner Boutique.  The link to the original is here.

These were soooooo good.  I do have to admit that not all the cups turned out well.  We kind of just mushed together the broken ones and after the toppings were on you really couldn't tell. 

Ingredients:

  • Pillsbury Sugar Cooke Dough.  (We used one tube)
  • 1 container of Cool Whip (we used lite)
  • 8oz of cream cheese (we used lite)
  • Fruit (we only had blueberries and raspberries so that's what we went with)

Directions:

Take mini muffin pans and grease or spray them so the cookie dough comes out.


Roll the dough into little balls.  Be careful and don't use too much.  We made that mistake on a couple and puffed up too much.  Put a dough ball in each muffin slot.


Preheat the oven to 350 degrees.  Bake for 6-7 mins.  Ours looked a little doughy but after cooling they were ok.  So after they are out of the oven make sure they cool for awhile.  If not when you take them out then the cup form will fall apart.  We used a butter knife after we were cooled to pry them out.  As I said...some we had to mush back together on the 1st round until we were used ot the process.


Notice that in the picture below...some were better looking than others.  I'm not a professional baker so for a 1st time experiment I thought they turned out ok.


In a bowl .... beat together the cream cheese and cool whip until its blended and smooth.  Put mixture into a plastic ziplock bag.  Cut a small hole in the corner to use as a piping bag.  Squeeze some of the cream cheese/cool whip mixture onto each cup.


Top with fruits.  We did 1 or 2 raspberries and blueberries on each one.  I've also seen these with strawberries and kiwi.


Then refridgerate your project for about an hour before serving.  This ensures that its all solid and can be picked up as finger food.


Chicken on Skewers with Peanut Dipping Sauce

 Saw this recipe on the blog Homemade by Holman.  The link to the orginal recipe is here.
 
I did this recipe when I was camping also because I was into "things on sticks" which made for easy cleanup since every dish we dirtied up had to be washed by hand.
 
I loved this chicken and sauce recipe.  I'd definitely make it again.
 
Ingredients:
 
  • 4-6 large boneless, skinless chicken breasts
  • 1/2 cup of apricot reserves
  • 4 tbsp of soy sauce
  • 3 cloves of garlic (I used minced garlic from the jar..sorry garlic press on camping wasn't something I was thinking of)
  • 2 tsp ground mustard (forgot the ground mustard so I used yellow mustard)
  • 3 tbsp of olive oil
  • 2 tbsp apple cider vinegar
  • 1 tsp crushed red pepper flakes
  • 1/4 cup creamy peanut butter
  • Juice of 1 lime (again no juicer while camping...I used the little squeezy lime juice from the produce aisle)
  • Dash of salt and pepper

Directions:
 
Cut the fat off the chicken and slice into strips that you can thread onto a wooden skewer.  Soak the wooden skewers in water so they don't burn while cooking.


Grab a large ziplock bag.  Dump in the sliced chicken.  Add 1/4 cup preserves, 2 tbsp soy sauce, garlic, mustard, oil, and vinegar into the bag.  Smoosh it all around so the chicken is coated.  Refridgerate for 1 hour.


Preheat the grill to a low temp.

Thread chicken onto wooden skewers and cook all the way through.

For the peanut dipping sauce.  I did bring the little mini cuisinart food processor which I absolutely love.

Put the peanut butter, remaining apricot preserves, remaining soy sauce, lime juice and crushed red pepper flakes in the food processor.  I pulsed it until it was smooth.

Serve and enjoy!


Wednesday, August 29, 2012

7UP Grilled Chicken

I saw this recipe on food.com and thought it was interesting.  7UP in a chicken marinade...hmmmm...I was curious.  The original recipe is here.

I modified it since soy sauce always seems to make it too salty for my taste.

The results were a grilled chicken that was moist and yummy.  It didn't dry out on the grill like a lot of chicken breasts do when cooked.
 
Ingredients:

  • 4 pieces of boneless skinless chicken
  • 1 can of 7UP or other lemon-lime beverage
  • 1 tsp garlic powder
  • 1/4 cup of soy sauce (original called for 1/2 cup but I didn't want all the saltiness)
  • 1/2 cup of canola oil

Directions:

Preheat grill.

Throw all the ingredients and chicken into a bag and marinate for 30-60 minutes (or longer).


Throw the chicken on the grill and grill until cooked without any pink inside.


Tuesday, August 28, 2012

Peach Cobbler Dump Cake

So one of my camping oven experiments was a peach cobbler dump cake.  I forget where I saw this recipe...maybe somewhere on allrecipes.com or foodnetwork.com. 

It was fabulous!  We walked up to the camp store and got vanilla soft serve to go with it.  Yum!

Ingredients:


  • Box of yellow cake mix (I used the general ShopRite brand)
  • 2 cans of peaches (in light syrup)
  • Ground Cinnamon
  • 2 tbsp of butter

Directions:

Take a 9x13 pan and grease the bottom.

Preheat the oven to 350 degrees (I this case the camping oven!)


Dump both cans of peaches into the pan.  Sprinkle yellow cake mix over the peaches evenly.


Press down on the mix.  (I used a spatula for this).

Cut the butter into little chunks and distribute evenly over the top of the mix.


Sprinkle with cinnamon.


Bake for 45 mins or until bubbling and browning on the top.  In the camping oven it took about 50 mins.  Just make sure you check on it at 30 mins since I did use the conventional oven for this one.

Slow Cooker Beef Au Jus (French Dip) Sandwiches

This recipe is the easiest thing ever and it was delicious!

This was also a camping thing.  Ok so maybe we weren't "roughing it".  As a good friend of mine calls it..."glamping". 

I brought the slow cooker along and put this on while we were swimming and fishing.

For tailgate I would make it ahead and transport and throw in the chafing dish to keep warm.

Ingredients:

  • 1 lb of deli roast beef (best if its still got some red to it since it will cook for awhile)
  • 2 cans of beef consomme
  • 2 cups of water
  • 1 packet of Lipton Onion soup mix
  • Provolone Cheese

Directions:

Set crock pot to low.


Put in all the ingredients except roast beef and stir.


Put in roast beef.

Cook on low for about 4 hours.


Serve on mini sub roll with provolone cheese on top.  Scoop out some of the beef broth into a little bowl and serve on the side of the sandwich.  Dip the sandwich in the broth each bite!

Grilled Italian Chicken Skewers

While we were camping I was loving grilling things on sticks.  I used a tried and true recipe.  Its so simple and tastes great.

I've done these many times for tailgate.  I just marinate everything ahead of time and throw it on the grill when we get there.  Super easy!

Ingredients:

  • Bottle of Italian dressing
  • 4-5 boneless skinless chicken breasts (cut into strips)
  • Wooden Skewers


Directions:

2-3 hours before grilling time.  Take the chicken strips and marinate them in the Italian dressing.


Preheat the grill

Thread chicken on to wooden skewers.  It will help if you soak the skewers in water for a bit before grilling so they don't burn.

Cook on grill until done.


**NOTE:  The picture shows the Peanut Dipping Sauce for another recipe.  The Italian skewers are the ones at the top of the picture on the right. **

Monday, August 27, 2012

Finally Got to Use the Camping Oven!

What can I say but this thing is absolutely awesome!  It's an oven and a stove for tailgating or camping.  And it works!


I just got back from camping and used this all weekend on a single canister of propane.  I made peach cobbler...overnight french toast casserole...chicken nuggets.


This was well worth every penny!!


I **heart** you camping oven :-)

Some words of advice...

  • Preheat the oven and play with the temps...even on the low setting it got hot in there quick.
  • When choosing your bakeware...make sure it doesn't hit from end to end inside.  This will block how the oven distributes heat and the dish will burn on the bottom since the heat has nowhere to go.

So after a couple trial runs I have it down.  If you follow those rules then you will be happy with the end result!

Friday, August 10, 2012

Paula Deen's Shore is Good Seafood Dip

Saw this recipe pinned on Pinterest.  Its from Paula Deen's website.

At first I was looking at it and thought ... I just don't know how this can be as good as Maryland Crab Dip with the Old Bay.  But let me tell you...it's great!  I would give it 5 out of 5 stars.  I have to ration myself with it and eat with carrots instead of crackers.  I modified the original recipe slightly.

Ingredients:

  • 1 lb of lump crabmeat, picked free of any broken shells, drained
  • 1/2 lb freshly grated Parmesan
  • 1/2 cup of shredded cheddar cheese
  • 1 cup mayonnaise
  • can cream of shrimp soup
  • 2 stalks celery, diced  (used the food processor to get it really fine) 
  • 1 medium onion diced  (used the food processor to chop really fine)
  • 2 tablespoons butter
  • 6 ounce shrimp, fresh or canned, drained.  (Used a frozen bag of shrimp that I thawed and precooked on grill)
  • 1/2 teaspoons white pepper


Directions:

Preheat oven to 325 degrees F. Melt the butter in a skillet over medium heat. Add the onion and celery, and saute for 2 minutes.

In a bowl, combine the soup, mayonnaise, Parmesan, cheddar cheese, crabmeat, shrimp, and pepper. Stir the sauteed vegetables into the seafood mixture and spoon this mixture into a lightly greased 8 x 11-inch casserole dish (I used the 8x8 Pampered Chef stoneware baker).

Bake for 30 minutes. Serve with toast points or crackers or carrots for a low carb option.


Roasted Beets

Went to a wedding in NYC in July and they served roasted beets stuffed with goat cheese.  I was skeptical since I don't usually like beets.  But they were awesome!

So I set out to figure out the beets.  I skipped the goat cheese this time until I had the beets down.  I went to the local farmers market and picked up some fresh beets.

These turned out well and I'll try again with the cheese.  The pictures of them are with the skins.  When you are ready to serve peel off the skins.

Ingredients:

  • 6-8 beets
  • Olive Oil
  • Salt Pepper


Directions:
 
Wash the beets in warm water.  Cut the ends off the beets.  Cut in half.
 
Preheat oven to 350 degrees.
 
Grease a 9x13 bake pan.  Rub some olive oil on the beets and spinkle with salt and pepper to taste.
 
I warn you ... be careful what you are wearing during the beet prep.   Beet juice will stain clothing and fingers.  I learned the hard way.
 
Cover with foil.  Bake in oven for approximately 45 mins.  Let cool slightly then peel the skins off.
 
I ate these over a salad with vinegarette dressing.
 

Berry and Banana Oatmeal Bake

Was looking for something for breakfast that was filling but not sugary.  This one fit the bill.  I found the original recipe on Skinny Taste blog and modified it slightly.  So far I've made two versions of this and they've both tasted great.

The original recipe is here.

Ingredients:

  • 2 medium ripe bananas,sliced into 1/2" pieces
  • 1 1/2 cup blueberries (I used about half a pint)
  • 1/4 cup honey (or agave)
  • 1 cup uncooked quick oats
  • 1/4 cup chopped walnuts or pecans (as an alternate for the first run I used chocolate chips since I didn't have walnuts)
  • 1/2 tsp baking powder
  • 3/4 tsp cinnamon
  • pinch of salt
  • 1 cup milk
  • 1 egg
  • 1 tsp vanilla extract
  • 1/2 cup of raspberries (this wasn't in the original but I wanted them in there)


Directions:

Preheat oven to 375 degrees.  Grease a 8x8 pan (I used a 9x13 baker for the 2nd attempt and it turned out great but just remember if you use a bigger pan to check and probably bake for less time since it will burn if in the whole 40 minutes)

Cover the bottom of the pan with sliced banana and raspberries.


In a mixing bowl combine oats, chocolate chips or walnuts, honey, baking powder, salt, vanilla, milk, egg and cinnamon.  Stir well.


Spread the mixture evenly over the bananas and raspberries in the pan.  Top with the blueberries.

Bake for 30-40 minutes until browning on the edges.  For the 8x8 pan it took the full 40 mins.  In the 9x13 baker it was closer to 30.  Do yourself a favor and check on it around the 25 minute mark just to make sure depending on how your oven cooks.

Let cool for 20 mins.  Cut into bars and serve.  I took a chunk each day for breakfast.  Store in the fridge for leftovers and you can even heat in microwave when you are ready to eat.


Sonomo Chicken Salad

Was looking for a good recipe to bring for lunch on a bed of lettuce.  Found the recipe on the Cooking Classy blog and modified slightly.  The orginal recipe is here.

This turned out so good.  I loved it and will be making it again and again!

Ingredients:

  • 3 1/2 cups cooked, shredded chicken (I used a rotisserie chicken that I got from ShopRite for $3.99)
  • 1 cup diced celery (about 3 stalks) -- I used the food processor to cut it extra fine
  • 2/3 cup chopped pecans -- Used the food processor again for this
  • 1/2 cup dried cranberries, such as Craisins, roughly chopped
  • 2 Tbsp finely grated Parmesan cheese
Dressing:
  • 2/3 cup mayonnaise
  • 3 Tbsp honey
  • 2 tsp apple cider vinegar
  • 1 tsp prepared yellow mustard
  • 1/2 tsp onion powder
  • Salt and freshly ground black pepper to taste


Directions:

Shred chicken from the bone and place in a bowl.

I mixed the pecans and celery from the food processor in first.  Then added the Craisins.


Finally I took all the ingredients for the dressing and mixed everything together in the bowl.  I served over a bed of lettuce for a delish lunch!


Grilled Pesto Shrimp

So I was in super grill mode on Sunday and decided to make a week's worth of leftovers for lunch in one day.  One of the things I'd been wanting to try is Pesto Shrimp.  I found a recipe from the Skinny Taste blog and decided to give it a whirl.  The link to the orginal recipe is here.

Trying to find basil in the store was a challenge.  No basil at all in the little packages.  But I found a basil plant for $1.99 that I bought.  Worked out great.  I picked what I needed and its still in the window and growing more!


These turned out great.  The orignial recipe called for skewers but I just did it in a grill basket and that worked out fine.

Ingredients:

  • 1 cup fresh basil leaves, chopped
  • 1 clove garlic (I used the minced garlic in the jar)
  • 1/4 cup grated Parmigiano Reggiano
  • 3 tbsp olive oil
  • 1 1/2 lbs jumbo shrimp, peeled and deveined
  •  salt and fresh pepper to taste

Directions:

In a food processor pulse basil, garlic, parmesan cheese, salt and pepper until smooth. Slowly add the olive oil while pulsing.  I used the mini food processor from Cuisinart.  This little thing is nothing short of amazing.  Its tiny, easy to clean and gets the job done for small projects.  It was also only $20 on Ebay.

Combine raw shrimp with pesto and marinate a few hours in a bowl.


Heat grill to 350 degrees.  Place shrimp in grill basket and grill until they are pink and cooked.  Do not burn.